

I cook. I want to make the world a better place. I have a small army of children, and a husband who is allergic to life. I'm resilient, what can I say?
Monday, November 21, 2011
Chocolates!
Okay, let's be honest, I cook every night, and I have pictures in my phone to upload, and then life gets in the way, and it all goes downhill. So, I'm on Fall Break right now, and I'm trying to get so much accomplished! LOOK I'M EVEN GOING TO BLOG. Today, I decided to make chocolates. I have this amazing little tool to make chocolates, and these incredibly cute transfers. The transfers are cocoa butter (no soy or dairy) and you can use enjoy life chocolate bars. I used this link in order to temper my chocolates. Your arm will *hurt* from all the stirring, but it's worth it. Look at how amazingly cute my chocolates turned out!


Monday, September 26, 2011
Mediterranean Chicken with Pasta or as Elise said, "Chicken Bacon"

I thought last night's dinner should have won some sort of award. It was a one dish meal, (well, I guess the noodles cooked separately) and it tasted like it came out of the back of some expensive restaurant. Also, since a friend of mine recently told me I don't really have a food blog because I don't ever have pictures, I have a picture of the food. NOW, I'm not saying it's a good picture, but it's a picture nonetheless. I had the children name this last night, and had nothing really creative come out of them. Maybe they were tired.
Needs:
1 lb boneless skinless chicken breast
3 tablespoons garlic olive oil
2 cups sliced baby bella mushrooms
1/2 cup diced (red, orange, or yellow) peppers
1/2 lb diced bacon
1/2 cube Edward & Son's not Chick'n Bouillon
1 can finely diced (or crushed) tomatoes
1 cup burgundy cooking wine
~1 cup of Mediterranean Olives OR Capers
1 tablespoon of flour
1/4 cup of water
1 lb of noodles
Prep:
Slice the chicken into small bite-size strips, if your mushrooms aren't presliced - slice them lengthwise, dice your pepper if it isn't prediced, slice your bacon into 1/2 inch pieces.
Make:
Begin browning the bacon in the large saucepan and start your water for boiling for noodles (two different dishes, just saying). Once the bacon is crispy add your mushrooms, peppers, and garlic olive oil. After the vegetables have softened some add the can of diced tomatoes, the cooking wine, olive mixture (I got mine from CostCo) OR capers, and the bouillon cube. (I will stop here and say that my vegetables are all prediced and then frozen, so if this looks a little thin add about 2 tablespoons of water) Let this simmer covered for about 5 or 6 minutes. At this point it's probably time to put your noodles in your boiling water. We went with traditional spaghetti noodles, but that doesn't stop you from using something different. Now, back to your main dish. Mix together the flour and water in a small bowl and stir into the bubbling mixture. Add your chicken, stir, and cover yet again. Your food should all be done at the same time. Enjoy!
Ours was served with a side of piping hot bread
Tuesday, September 13, 2011
Chicken Spinchetta
Yes, I seriously made up the name by myself. Don't you love it? Okay, don't laugh. However, after I tell you how to make it, you'll be giggling all the way to the kitchen. I created this recipe out of desperation the other night. I had to leave the house and start dinner at the same time (I wasn't going to be back for about 2 hours). So, instead of creating a duplicator (like Calvin) I invented this dish on the spot. I'm a genius. I hope you like it as much as my family did.
Needs:
1/2 a bag of frozen spinach
1 jar of Trader Joe's Bruchetta
~1 lb of frozen boneless chicken breasts
1 box of farfalle noodles
garlic olive oil (optional)
Prep:
Set oven to 325 degrees
Make:
In a 2 quart lidded casserole dish layer the spinach, chicken breasts, and jar of bruchetta. Put the lid on the dish and slide into the oven. It doesn't have to be preheated. This will cook for about one and a half hours. HOWEVER, if your chicken breasts are dethawed it will take 30-45 min. IF you decide to use dethawed chicken I suggest adding about 1/4 cup of water to the casserole dish before putting it in the oven. When there's about 20 min left on the timer set your water to boil, cook your farfalle noodles as directed and after they've drained drizzle garlic olive oil over them. Remove your casserole dish from the oven when the timer goes off, check that your chicken has reached the almost done point. Shred the chicken (which will be tender and moist) and serve over your noodles. Serve with a side of fresh baked bread!

Needs:
1/2 a bag of frozen spinach
1 jar of Trader Joe's Bruchetta
~1 lb of frozen boneless chicken breasts
1 box of farfalle noodles
garlic olive oil (optional)
Prep:
Set oven to 325 degrees
Make:
In a 2 quart lidded casserole dish layer the spinach, chicken breasts, and jar of bruchetta. Put the lid on the dish and slide into the oven. It doesn't have to be preheated. This will cook for about one and a half hours. HOWEVER, if your chicken breasts are dethawed it will take 30-45 min. IF you decide to use dethawed chicken I suggest adding about 1/4 cup of water to the casserole dish before putting it in the oven. When there's about 20 min left on the timer set your water to boil, cook your farfalle noodles as directed and after they've drained drizzle garlic olive oil over them. Remove your casserole dish from the oven when the timer goes off, check that your chicken has reached the almost done point. Shred the chicken (which will be tender and moist) and serve over your noodles. Serve with a side of fresh baked bread!
Wednesday, August 24, 2011
Indian Chicken Curry
I'm not dead! Things have just been crazy with school and some work and a new allergy. Who would have thought that one more would turn life upside down. We're now avoiding all dairy. I'm waiting for another shoe to drop. Seriously. However, in the middle of all of this I've gotten pretty creative with coconut milk, almond milk, and cultured (not)milk. It's exciting, and always a cooking adventure where I live. Which is why I decided to make this Chicken Curry recipe. It turned out SO good that I want to share it! This was modified from allrecipes.com.
Needs:
· 3 tablespoons olive oil
· 1 small onion, chopped
· 1 teaspoon crushed garlic
· ¼ cup curry powder
· 1 teaspoon ground cinnamon
· 1 teaspoon chili powder
· 1 bay leaf (MAGICAL)
· 1/2 teaspoon ginger
· 1/2 teaspoon white sugar
· 1 teaspoon salt
· 2 skinless, boneless chicken breast halves - cut into bite-size pieces
· 1 tablespoon tomato paste
· 1 cup plain coconut yogurt
· 3/4 cup almond or coconut milk
· 1 tablespoon lemon juice
· Plain couscous for 4-6.
Prep:
Cut your chicken into bite size pieces. I advise mixing together the curry powder, cinnamon, chili powder, bay leaf, ginger, sugar, and salt in a small bowl. It just makes that step much easier.
Directions:
1. Heat olive oil in a skillet over medium heat. Saute onion until lightly browned (this takes about ten minutes – be patient you want the onions really nice and sweet). Stir in the bowl that contains your garlic, curry powder, cinnamon, paprika, bay leaf, ginger, sugar and salt. Continue stirring for 2 minutes. Add chicken pieces and stir well. Then add tomato paste, coconut yogurt, and milk substitute. Bring to a boil, reduce heat, and simmer for 20 to 25 minutes.
2. Start boiling the water for your couscous, and follow the directions.
3. Remove bay leaf, and stir in lemon juice. Simmer 5 more minutes.
4. Serve curry on top of couscous. This dish had a side of black lentils at our house! Enjoy!
Sunday, May 29, 2011
Hostess(tm) Cake Balls

The cake recipe comes from my standard Better Homes and Garden's Cookbook, and if it looks familiar, yes it was used here.
Cake Needs:
3/4 cup of butter
3 eggs
1 cup all purpose whole wheat white flour
1 cup Pastry Flour (Arrowhead Mills)
2 tsp Vital Wheat Gluten (Arrowhead Mills)
3/4 unsweetened cocoa powder
1 tsp baking soda
3/4 tsp baking powder
1/2 tsp salt
2 cups sugar
2 tsp vanilla
1 ½ cup milk
Cake Prep:
Let butter and eggs stand at room temperature for 30 minutes
Lightly grease 1 9x13 cake pan with butter (not the butter that's sitting out)
Place waxed paper in the bottom of the cake pan.
Preheat oven to 350 degrees
Cake Make:
In medium bowl mix together all flour, gluten, cocoa powder, baking soda, baking powder, and salt.
In a large mixing bowl beat butter with electric mixer on high for 30 seconds. Add sugar, a 1/4 cup at a time, beating on medium after every addition. After all sugar has been added scrape sides of bowl and beat for an additional 2 minutes. Add eggs 1 at a time, beating after each addition. Add vanilla, beat.
Alternate adding the flour mixture and the milk to the butter mixture, beating on low speed after every addition until just combined. Once everything has been added, scrape the sides of the bowl and beat for about 20-30 seconds more. Spread the batter into your cake pan.
Bake in oven for 45 minutes until a wooden toothpick inserted near the center comes out clean.
3/4 cup of butter
3 eggs
1 cup all purpose whole wheat white flour
1 cup Pastry Flour (Arrowhead Mills)
2 tsp Vital Wheat Gluten (Arrowhead Mills)
3/4 unsweetened cocoa powder
1 tsp baking soda
3/4 tsp baking powder
1/2 tsp salt
2 cups sugar
2 tsp vanilla
1 ½ cup milk
Cake Prep:
Let butter and eggs stand at room temperature for 30 minutes
Lightly grease 1 9x13 cake pan with butter (not the butter that's sitting out)
Place waxed paper in the bottom of the cake pan.
Preheat oven to 350 degrees
Cake Make:
In medium bowl mix together all flour, gluten, cocoa powder, baking soda, baking powder, and salt.
In a large mixing bowl beat butter with electric mixer on high for 30 seconds. Add sugar, a 1/4 cup at a time, beating on medium after every addition. After all sugar has been added scrape sides of bowl and beat for an additional 2 minutes. Add eggs 1 at a time, beating after each addition. Add vanilla, beat.
Alternate adding the flour mixture and the milk to the butter mixture, beating on low speed after every addition until just combined. Once everything has been added, scrape the sides of the bowl and beat for about 20-30 seconds more. Spread the batter into your cake pan.
Bake in oven for 45 minutes until a wooden toothpick inserted near the center comes out clean.
The icing recipe comes out of my Better Homes and Garden's Cookbook, it is half of a recipe. I didn't modify it. Be proud. Half of this goes in your cake balls, half of it is used for decoration.
Icing Needs:
4 oz organic valley cream cheese
1/4 cup butter
1 tsp vanilla
3 cups powdered sugar
Icing Prep:
Set out cream cheese and butter to soften.
Icing Make: Beat cream cheese, butter, and vanilla with electric mixer until light and fluffy. Gradually add 1 cup of powdered sugar beating well. Gradually beat in additional 2 cups powdered sugar to reach spreading consistency.
CAKE BALLS: Cut the center of your cake out after it has cooled leaving the "crispy edges" behind and put in a medium sized bowl. Add 1/2 of your cream cheese icing and mix well using your hands. *You will have extremely sticky hands* Use a cookie scoop or your hands to make the balls. They should be no larger than a standard truffle. Think bite size. I made these with an ice cream scoop, and they were WAY too much for any normal person to handle. The cake balls will be formed and placed on a cookie sheet prelined with wax paper. While making your cake balls remember to push a hole in them on one side. There has to be a place for the cream filling to go! Save about 2 cake balls worth of your icing/cake mixture in the bottom of your bowl (to cover the holes later) and put the cake balls into the freezer. Now you get to make your cream filling! This is the cream filling that the blogger who came up with these fantastic treats came up with, obviously I substituted where the shortening is involved. This is also not the cream filling I used. I wasn't totally sold on my cream filling, and I figured this one was probably better. Seriously, marshmallow creme, nom.
Cream Filling Needs :
2 tsp very hot water, not boiling
1/4 tsp salt
1 jar (6 oz) marshmallow creme (Jetpuffed)
1/2 cup coconut oil
1/3 cup powdered sugar
1/2 tsp vanilla
Cream Filling Make:
Dissolve salt into hot water and set aside to cool. Whip marshmallow creme, coconut oil, powdered sugar and vanilla until fluffy. Add water/salt mixture to marshmallow mixture once cool and whip well.
Back to Cake Balls: Remove your chilled cake balls from the freezer. This cream is going to go inside your fantastic little chilly balls. I recommend using a ziplock bag with the corner cut off. I'm all for reduce and reuse, but you will never reuse something with marshmallow fluff. It just won't happen.
Now, after your cake balls have all been filled, remember that extra cake mix from earlier? No, you weren't supposed to eat it. Press it into nice little flat circles and cover the open end of your cake balls. This just keeps getting better doesn't it. Now, back into the freezer these go. While they're in the freezer, you should consider recouping your kitchen or something. Give it a good once over, because you're halfway through. Then get out your bag of Enjoy Life Semi Sweet Chocolate Pieces and melt it gently in the microwave. Ie, put in a glass bowl large enough to hold all the chocolates, and yet small enough that you can dunk the balls. Microwave for 20 seconds, stir, microwave for 20 seconds, stir, microwave for 20 seconds, stir and DONE!
Take your cake balls out of the freezer and you are ready to dip them! I was awful at this part. I had chocolate everywhere. I hope you're better at this than I was. Place the cake ball in the melted chocolate and roll them around, use a fork and flip them over. Then use that same fork (maybe two) to remove that ball from the chocolate. Place back in spot on wax paper covered cookie sheet. Repeat. Put these back in the freezer while you prep your fancy smancy cake decorating bag with the rest of the cream cheese icing from earlier. I recommend using a nice bag for this part. You can decorate these puppies as if they were really Hostess (tm) or you could have fun with them. Either way, it's up to you.
Can you believe I stayed up way past midnight doing this one night? I can't. I hope you enjoy.
Beef with Broccoli and Asparagus
I am a bad blogger. Okay, now that we've gotten that out of the way, we can get on with the recipe. This was a happy little number I *gasp* modified from cooks.com. Turned out amazing. I added asparagus in order to make it stretch a little further and the flavors ended up complimenting one another. Who knew?
Needs: 2 tsp. not soy sauce
1/4 tsp. sugar
1/4 tsp. salt
3/4 lb. boneless sirloin
1/4 tsp. salt
3/4 lb. boneless sirloin
1 tbsp. cornstarch
1 tbsp. not soy sauce
1 tbsp. med. dry wine
1/4 c. water
1 tsp. sugar
1 tsp. sunflower seed butter mixed with 1 tsp canola oil
1 tbsp. not soy sauce
1 tbsp. med. dry wine
1/4 c. water
1 tsp. sugar
1 tsp. sunflower seed butter mixed with 1 tsp canola oil
3 tbsp. canola oil
1 tbsp. ginger
1 tbsp. minced garlic
1/2 tsp. dried hot red pepper flakes
12 oz frozen broccoli florets
1 tbsp. ginger
1 tbsp. minced garlic
1/2 tsp. dried hot red pepper flakes
12 oz frozen broccoli florets
12 oz frozen asparagus tops
Prep:
Begin cooking brown or white rice to accompany this dish.
Begin to thaw frozen broccoli and asparagus
Slice your sirloin into ¼ inch thick slices and marinate it in 2 tsp not soy sauce, ¼ tsp sugar, and ¼ tsp salt for 20 min.
In another small bowl dissolve the 1 tbsp cornstarch into the 1 tbsp not soy sauce, add 1 tbsp wine, ¼ cup water, 1 tsp sugar and sunflower butter-canola oil mixture (This is your “sauce”).
Cook:
Put 3 tablespoons oil in stir fry pan or wok, add ginger, garlic, red pepper flakes, and meat. Cook on medium-high heat. Once meat is almost cooked, remove from pan into clean dish. Add broccoli and asparagus to wok and cook to desired tenderness. Add the cooked beef back to the wok and cook for 1-2 minutes. Add your prepared sauce from earlier and simmer for 5 minutes. Serve hot over rice.
Wednesday, May 11, 2011
Amazingly cute headbands!

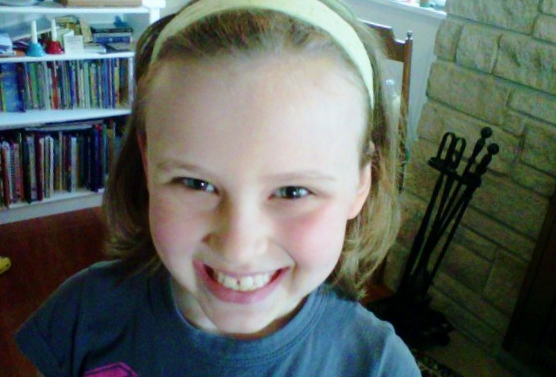
A friend of mine on FB linked this adorable headband tutorial, so I thought I'd share. I love wearing headbands. LOVE them. But what happens when I go to the store goes something like this, "Oh, this one is cute, hmmm, maybe, erm, snakeprint, WHY, I like this one! Twenty dollars, never mind, I think I can MAKE THESE..." And I have made a couple out of ribbon and elastic, but I like the fabric idea because it opens up SO MANY possibilities. I'll post pictures once I get them cut and sewn. Until then, enjoy her pics.
Notes postfact: I made these with no interfacing and they came out great. I also used a scant 1/4 inch seam because I wanted them a little wider. The girls are thrilled with them, and I used size medium. The safety pin trick is awesome. Duel sided headbands were an amazing idea it's like a twofer!
Subscribe to:
Posts (Atom)